Cabinet Crown Molding & Trim Options Explained
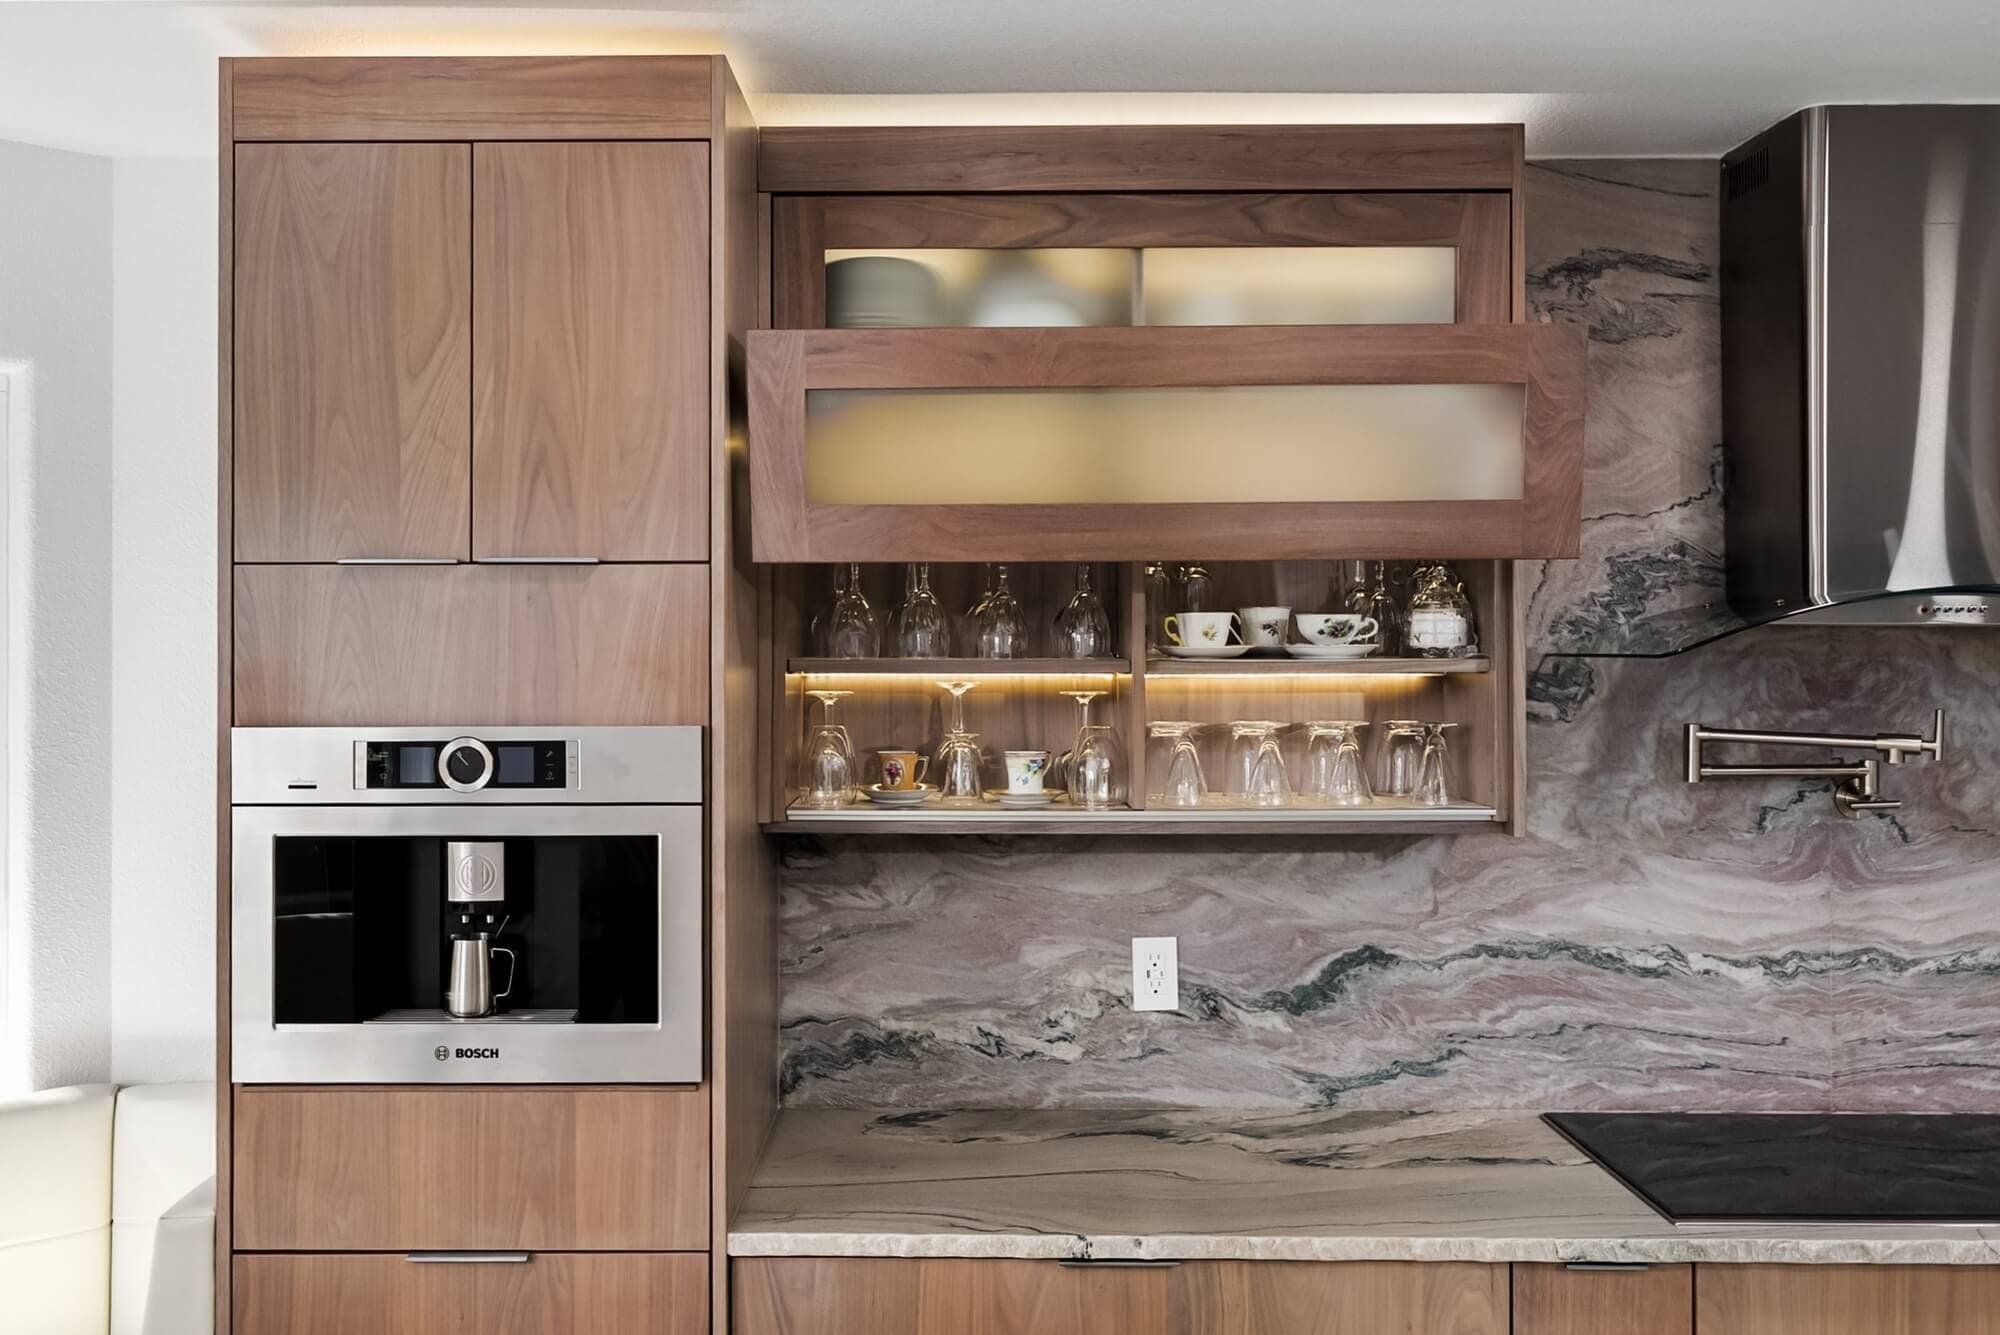
You can invest in beautiful new cabinets and still walk into the finished kitchen thinking, “Why doesn’t this feel done yet?” Most of the time, the missing piece isn’t another cabinet run or appliance upgrade.
It might be the trim that connects everything.
The right trim helps resolve the small transitions that can make a kitchen feel unfinished: the space where the cabinet line meets the ceiling, the edge beneath wall cabinets, or the gaps around walls and appliances. When those details are handled well, the cabinetry feels more integrated, the room looks more intentional, and the entire kitchen reads as one complete design rather than a collection of separate parts.
This guide breaks down the main types of kitchen cabinet trim, including traditional crown molding and light rail molding, so you can understand what each piece does, how the details work together, and which choices make the most sense for your kitchen.
What Is Kitchen Cabinet Trim?
Kitchen cabinet trim is the collection of finishing pieces used around cabinets to create cleaner transitions, conceal small gaps, and give the installation a more built-in appearance. Depending on the layout, that can include cabinet crown molding, light rail molding, toe kicks, fillers, scribes, and finished panels.
Cabinet crown molding finishes the top edge of wall or tall cabinets and helps create a cleaner transition between the cabinetry and the ceiling. Light rail molding finishes the lower edge of wall cabinets and can help conceal under-cabinet lighting.
Together, these pieces act like a picture frame for your kitchen. They don’t shout for attention, but they help determine whether the room feels “almost there” or genuinely finished. When the tops and bottoms of your cabinets meet the walls and ceiling cleanly, people read the whole wall as one continuous, intentional design instead of a set of boxes placed side by side.
In real kitchens, that means three things happen right away:
- The eye has a clear path: It moves smoothly from floor to ceiling instead of stopping at gaps and shadows.
- The room feels more refined: Even stock cabinets can look closer to custom cabinetry when edges, seams, and joints are resolved.
- Distractions disappear: You notice the backsplash, countertops, and lighting, not wall gaps or spots where cabinets meet drywall.
You feel that difference every time you walk in, even if you never use the words crown, light rail, or scribe molding.
How Cabinet Crown Molding Changes the Way Your Kitchen Feels
The biggest visual effect of cabinet crown molding is the way it changes the relationship between the cabinetry and the ceiling. By creating a more continuous transition at the top of the cabinets, the crown can make the cabinetry feel taller, cleaner, and more integrated with the room.
Without a crown, your eye may stop at the cabinet tops and jump to a dark gap or uneven ceiling line. With the crown, that transition becomes more intentional, helping separate cabinet boxes read as a more unified wall of cabinetry. A modest crown profile can also work with the minor waves and dips found in many ceilings rather than emphasizing them with ultra-crisp, unforgiving lines.
Crown isn’t mandatory in every kitchen. In very low rooms, a big, ornate profile can make the ceiling feel heavy. In ultra-minimal spaces, a deliberate gap between the cabinet and ceiling can be part of the design. The real question is what mood you want: a finished, built-in wall of cabinetry or a lighter, more open look with visible negative space.
Matching Crown Profiles to Your Cabinet Style and Finish
The best cabinet molding for your kitchen depends on your cabinet door style, ceiling height, and how formal you want the room to feel. Getting the shape, material, and finish to work together keeps the top of the room from looking random and helps your cabinets read as one coherent design instead of a mix of parts.
H3: Crown Style Families That Usually Work
Most cabinet crowns fall into a few visual families. Matching the family to your door style keeps everything in tune and enhances everything from visual height to a furniture-like style that complements your kitchen's design center:
- Flat or Shaker crown: Straight or stepped designs work well with Shaker or slab doors in clean, modern kitchens where a simple cabinet line is key.
- Cove crown molding and ogee profiles: Their curved shapes offer deeper shadows, making them perfect for traditional crown molding styles that suit classic or traditional kitchen cabinets.
- Stacked or built-up crown: For maximum drama and an upscale feel, these consist of two or more pieces combined to add height and formality to tall cabinets.
In a minimalistic Shaker kitchen, a flat crown offers subtlety and tailored elegance. By swapping in a deeply carved ogee or cove crown molding, the same cabinets can embrace a more traditional, timeless appeal typical of conventional kitchen designs.
Choosing Materials That Behave Like Your Kitchen Cabinets
Selecting the right materials is vital, as they influence stability, finish quality, and the crown molding's response to humidity. This careful consideration ensures that any necessary drywall work aligns seamlessly with the molding.
Depending on the cabinet line and manufacturer, crown and other cabinet molding pieces may be available in various materials and finish options, such as:
- Solid wood: Ideal for stain-grade applications where matching the cabinet’s wood grain is crucial.
- MDF (medium-density fiberboard): Smooth and dimensionally stable, MDF is excellent for paint-grade applications in modern or painted custom cabinetry.
- Other paint-grade materials: Varies by manufacturer; these can enhance specific cabinet lines for a cohesive look.
Aligning crown material and finish with the cabinet line ensures the trim complements the doors, frames, and panels, creating a unified appearance.
Finish Choices That Enhance Your Kitchen’s Aesthetic
The selected finish can either allow the crown to blend seamlessly with the cabinets or stand out as an intentional design choice.
- Matching stain or paint: This option lets the crown visually disappear into the cabinet, allowing the run to look like a single, cohesive piece.
- Contrasting wood over painted cabinets: Offers warmth and a furniture-like style, adding significant visual weight to the kitchen ensemble.
- Ceiling-colored or contrasting crown: Employing ceiling crown molding as a deliberate design choice changes the transition's perception between cabinets and the ceiling.
Choosing a matching finish is a safe route, but opting for contrasts and ceiling-related details must be executed deliberately and ideally planned with the help of kitchen design experts for the best results in coordination with lighting and wall gaps.
Incorporating base molding, different angle crown molding, light rail molding, and other varieties can further enhance your kitchen cabinets and support additional elements like lighting, ensuring every aspect of your space feels meticulously planned and well-executed.

Sizing Cabinet Crown Molding for Your Ceiling Height
Ceiling height is one of the biggest factors in how cabinet crown molding should be proportioned. Smaller profiles tend to work better in lower rooms, while taller ceilings can usually support deeper or built-up crown without making the cabinetry feel top-heavy.
Here is a simple starting point for thinking about ceiling height and crown size:
| Ceiling height | Typical crown approach | Best for |
| 8' ceiling | Smaller or more restrained crown | Most standard kitchens with wall cabinets near the ceiling |
| 9' ceiling | Moderate crown or layered detail | Taller rooms, stacked uppers, or more formal trims |
| 10'+ ceiling | Deeper or built-up crown may work well | Grand rooms, tall pantries, or highly detailed designs |
These are design starting points rather than fixed rules. Door style, cabinet height, appliance placement, ceiling conditions, and the overall look you want all affect the right proportion.
How Cabinet Height and Door Style Affect Crown Size
Ceiling height is only half the story. Two more choices shape how your cabinet molding looks in the room:
- Cabinet height: Full-height cabinets with modest crown feel streamlined and maximize storage. Cabinets that stop short of the ceiling can carry a taller or stacked crown that looks richer and helps visually bridge the gap.
- Door style and formality: Simple Shaker or slab fronts usually prefer leaner profiles; raised-panel or highly detailed doors can support a deeper, more carved crown without feeling top-heavy.
- Overall mood: Casual, modern kitchens tend to look best with a cleaner, smaller crown, while traditional or formal spaces can handle more detail and height.
Reviewing side elevations with a designer is one of the quickest ways to see how different crown heights actually sit on your layout before anything is ordered.
At Cabinet IQ, those decisions are considered as part of the larger kitchen design rather than in isolation. Accurate field measurements and 3D renderings help homeowners see how cabinet height, crown, appliances, and surrounding details will work together before the design moves forward.
Common Sizing Mistakes to Avoid
A few predictable missteps show up again and again:
- Oversized crown on lower ceilings: Can make the room feel shorter and upper cabinets feel crowded.
- Tiny crown on tall walls: Can look like an afterthought instead of a deliberate design choice.
- Ignoring hood and appliance clearances: Can let the crown collide with tall refrigerators, vent hoods, or beams.
- Choosing a crown before the layout is final: Increases the chance that profiles conflict with doors, hoods, or panels.
Catching these in drawings is far easier than solving them once cabinets and trim are already on the wall.
Kitchen Cabinet Trim: Light Rail Molding and Supporting Details
If the crown finishes the top of your cabinets, the light rail molding finishes the bottom. It’s a slim band that can conceal potential under-cabinet fixtures and small gaps so your lighting looks soft and intentional instead of harsh and exposed. That one piece can be the difference between seeing the fixture beneath the cabinets and enjoying a cleaner glow across the backsplash.
Beyond crown and light rail, a small set of kitchen cabinet trim pieces quietly cleans up everything below eye level and around your appliances, so the whole room hangs together.
What Light Rail Molding Actually Does
A good light rail profile earns its place in several ways:
- Hides under-cabinet lighting fixtures so you see light, not hardware.
- Creates a clean lower edge along wall cabinets.
- Helps coordinate the lighting and cabinetry so the two feel designed together rather than added separately.
Depth matters as much as shape.
Too shallow, and you may still see the fixtures from across the room. Too deep, and the trim can cast a heavier shadow or crowd a tall tile pattern. When you plan under-cabinet lighting, it pays to confirm fixture placement and light rail depth together so they work as a pair, not in competition.
Other Small Trim Pieces That Finish the Room
Several other parts usually come into play if you want a truly built-in look:
- Toe-kick covers: Finish the recessed area under base cabinets and hide legs or levelers.
- Fillers and finished panels: Take up odd gaps at walls or appliances so doors clear and proportions feel deliberate.
- Scribe molding and decorative details: Thin cabinet moldings that help hide small gaps, plus valances, posts, or other details that frame focal areas like the range wall.
Most guests will never name these pieces, but they absolutely feel the difference between a layout that stops abruptly and one that looks tailored to the room.
A Ceiling-First Way to Plan Your Kitchen Cabinet Trim Package
The easiest way to plan kitchen cabinet trim is to work from the ceiling down instead of from a parts list up.
That top-down approach helps avoid surprises and keeps your budget and design aligned.
Start With the Ceiling and Tall Elements
Begin by locking in how cabinets relate to the ceiling: full-height with a modest crown, or a gap bridged by taller or stacked crown. Next, place tall elements, pantries, refrigerator surrounds, oven towers, and the hood, because those pieces often set the crown line and dictate how fillers and scribes need to work.
Once those anchors are clear, you can walk each wall cabinet run, confirming where the light rail belongs, how it interacts with under-cabinet lighting, and how tall your backsplash will be. If you’re sketching this yourself, even a simple side elevation on paper will surface conflicts early and give you much more confidence before you order.
Choose a Trim Package Tier That Matches Your Goals
Thinking in trim “tiers” keeps both design and budget under control:
- Lean approach: Toe kicks, basic crown where it matters, and light rail only where under-cabinet lights will go.
- Complete approach: Adds fillers, scribes, and finished panels so tall units and appliances feel built-in.
- Fully detailed approach: Layers in stacked crown, decorative posts, and valances at focal points like the range wall.
These are useful planning categories rather than formal Cabinet IQ product packages.
Once you see your kitchen through these tiers, it becomes easier to decide where trim will have the biggest visual payoff and where you can comfortably keep things simpler.
Cabinet Trim Installation Steps
A truly built-in look comes from both the selection and order of crown, light rail, fillers, and scribes. Even the best selections can fall flat if they’re applied out of sequence. Cabinet installers use trim to resolve the real-world places where cabinetry meets imperfect walls, ceilings, and appliance openings.
The exact sequence can vary by cabinet system and project, but a typical installation follows this general order.
Step 1 — Set and Level the Cabinets
Install and level all base, wall, and tall cabinets first, using the appropriate shims and fasteners so everything is solid, square, and anchored.
Step 2 — Add Fillers and Scribes
Fit fillers at walls and appliances, then add scribe molding where needed to help resolve small gaps caused by walls or ceilings that are not perfectly straight.
Step 3 — Install Crown and Light Rail
With cabinets fixed in place, install crown along the tops and light rail beneath the wall cabinets where the design calls for it.
Step 4 — Complete Finish Touch-Ups
After the trim is on, address small joints, complete appropriate finish touch-ups, and do a final alignment check of doors, drawers, and surrounding trim.
Working in this order helps minimize surprises. Each step builds on the last, so the finishing details support a solid installation instead of trying to disguise problems at the end.

When to DIY Cabinet Trim and When to Bring in a Specialist
A basic crown and light rail may be manageable for an experienced DIYer in a smaller kitchen, and if:
- Layout is straightforward
- Your ceilings are fairly straight
- You’re comfortable with a miter saw
The risk is in subtle gaps, uneven reveals, and misaligned joints that become more noticeable once the light hits them.
A cabinet specialist will be needed for:
- Complex layouts
- Wavy ceilings
- Stacked crown
- Appliance panels
- Higher-investment kitchen remodels
Bringing in a cabinet specialist for cabinet replacement can reduce the risk of visible finish problems and costly rework. It’s easy to discover late in the game that the crown collides with a refrigerator panel, competes with the hood, or magnifies an out-of-square corner.
If your project sits on that line between “doable” and “stressful,” a Cabinet IQ design consultation can help you sort through the tradeoffs before anything is cut or installed.
Looking at the cabinetry, trim, appliance clearances, measurements, and surrounding details together early can help prevent small design conflicts from becoming bigger installation problems.
Turning Your Trim Decisions Into a Kitchen That Finally Feels Finished
Once you start seeing crown, light rail, and small trim pieces as parts of a single picture instead of separate upgrades, the decisions get much simpler. You can stand in your kitchen and quickly spot where a modest crown band would clean up the ceiling line, where light rail would help conceal under-cabinet fixtures, and where fillers or panels would help tall cabinets and appliances feel truly built in.
If you’d like an experienced team to walk that picture with you, scheduling a design consultation or showroom visit with Cabinet IQ is a straightforward next step.
Bringing a few photos and rough measurements gives a designer useful context for discussing crown proportions, light rail, cabinet style, and other finishing details in relation to your space and budget, so the finished kitchen feels intentional, complete, and well resolved from top to bottom.